Pages

Tuesday, July 31, 2012

Stampin' Up! From My Heart Card

click on photo to see details
This card was made with the "From My Heart" stamp set by Stampin' Up! Inside it says,"Hang in there". 
 
Current Stampin' Up! products can be viewed at my Stampin' Up! store.
 
I would love to be your Stampin' Up! demo if you don't already have one!
 
Have a blessed day,
Trude 

Monday, July 30, 2012

Stampin' Up! Words of Courage Card

http://stampwithtrude.blogspot.com Stampin' Up! greeting card by Trude Thoman Words of Courage stamp set
click on the photo to see the details
I made this card with Stampin' Up's! Words of Courage stamp set. I also used the polka dot embossing folder, the lattice embossing folder, the top note die, and a rhinestone.
 
See the current selection of stamps and paper at my 24/7 Stampin' Up! store

Have a blessed day,
Trude

Thank You Card

click on photo for details
This card is a gate fold card (It opens in the middle instead of at the side). The sentiment is by Anna Griffin.

Sunday, July 29, 2012

Sweet as Honey Greeting Card

click on photo to see details
This card is embossed with the Fiskar honeycomb embossing plate. On the inside it says, "May my words be as sweet as honey, because I may have to eat them."
 
Good thing to remember!
 
Happy Day,
Trude


Friday, July 27, 2012

Falling Leaf Card

I used craft paper for the base of this card. I embossed the green paper with an embossing folder. I used two circle punches to make the reinforced eyelet on the tag and I used a sticker for the leaf embellishment. It's a fun fall card!

Have a happy day!

Trude

Thursday, July 26, 2012

O' Christmas Tree, O' Christmas Tree Christmas card


I embossed a blue card front and then rubbed it with silver Brilliance ink. I punched out sparkly snowflakes, and stamped and heat embossed a silver tree. Then I cut the tree out and adhered it to the card along with the sparkly snowflakes. I attached some rhinestones and stamped a Christmas sentiment inside. Too much Fun!

Have a blessed day,

Trude

Wednesday, July 25, 2012

Violet Greeting Card

click to view details
Here's a card for all you violet lovers. The purple card base is over-stamped with lavender Brilliance ink. I used chalks to daub color on the stamped violets. This is a quick card, another CAS. The coloring doesn't take much time with the chalks.

Tuesday, July 24, 2012

Layered Labels and Snowflake Soiree cards

click on photo to view details
These are the other 2 cards that we made in the Christmas in July class that I had last Sunday. The one on the left uses the new Christmas papers and Layered Labels stamp set. The one on the right uses the new Snowflake Soiree stamp set that will be available for purchase on the first day of August. 
Check my website to see all the new holiday craft supplies that are available. 
 
Have a blessed day,
Trude

What's Up? Greeting Card

click on photo to view details
The front looks like there is a dark trim along the edge, but it is just a shadow. This is a bright and cheery card. Fun for a friend you haven't heard from for awhile. I used Brilliance ink to stamp the sentiment and the decorative border. I know that it isn't the most popular ink right now, but I still love it.

Monday, July 23, 2012

Stampin' Up! Christmas Lodge Christmas cards

http://stampwithtrude.blogspot.com Stampin' Up! Christmas card by Trude Thoman
click on photo to view details
We created these cards yesterday at Christmas in July. If you weren't there, you missed a lot of fun. Christmas presents, Christmas music, Hot Spiced Cider, Christmas recipe exchange. Be sure you don't miss out next year! This is just 2 of the 4 cards that we created. Check back tomorrow to see the other 2. These cards were made with the Christmas Lodge and Teeny Tiny Messages stamp sets by Stampin' Up! 

If you would like a Stampin' Up! catalog, I will send you one for the price of postage. Contact me at trude.thoman@yahoo.com

Or check out my 24/7 online Stampin' Up! store by clicking here

I'd love to be your demonstrator.

Have a Stamp Happy Day,

Trude

Cricut Wedding Card

click photo to view details


I used a Cricut to cut the elements for this card. All the papers, except the blue, are shimmery.

Since I used the Cricut for this card, you know that it took more than 10 minutes to make! Therefore it is not a CAS. But I think it is beautiful and I'm sure the recipients will like it.

Birds and Roses Greeting Card

click on photo to view details

The card base is by Paper Pizazz and the stamp is a retired Stampin' Up! stamp. It makes a sweet note card and a clean and simple card.

Look at the current stamps that Stampin' Up! offers at my 24/7 Stampin' Up! store

And if you are looking for a demonstrator, I would be happy to help you!!

Sunday, July 22, 2012

Bright and Fun Crocodile Card

click on photo to view details
This is a quick card, especially if you use a base card from a package of cards that you buy all ready to be embellished like I did here. Then I wrapped a bright ribbon around the card base, stamped a crocodile and accompanying sentiment. Layered it on paper printed with bright color swatches and adhered it to the card. It could say, "Thinking of You", or "Happy Birthday" inside the card. I put a wiggle eye on it for added fun. Another Clean and Simple (CAS) card!

Friday, July 20, 2012

Everyday note card

click on photo to view details

This card was made with an ink that bleaches out the paper when ironed with an iron. It is kind of fun, but so far this is the only card I have made using this ink.

Have you tried this type of ink, or used bleach? Tell me about it. Leave your comments below.

Thursday, July 19, 2012

Kindness Matters Thank You card

click on photo to view details

Kindness matters stamp set was used for this Thank You card. All supplies are Stampin' Up!

To see what the latest stamps and supplies from Stampin' Up! are please check out my 24/7 Stampin' Up! store

I'd love to be your demonstrator if you don't currently have one.

Wise Men Christmas Card

click on photo to view details
This is an elegant card with glitter swirls. The glitter doesn't show up well in the photo. The shapes are cut with the Cricut. This is a 5" x 7" card.

Wednesday, July 18, 2012

June Stampin' Up! Club Cards

click on the photo to view details

These are 3 of the cards that we made at the June Club meeting.

To check out what is new at Stampin' Up! click here.

Tuesday, July 17, 2012

May Stampin' Up! Stamp Club Cards

click on photo to view details
This is 3 of the 4 cards that we made at the May Stampin' Up! club meeting. 
 
To see what is current at Stampin' Up! click here.

Simply Sweet Notecard

click on photo to view details
This card is simple but sweet. I cut an inch off the front and added a red border that I had cut with scallop scissors. I tied a ribbon over the seam and stamped and matted a floral image and mounted it to the front of the card.

Monday, July 16, 2012

Giftable Bookmarks

click on photo to view details
Stamp collage bookmarks. The one on the left is Inkadinkado or Rubber Stampede and the one on the right is Tim Holtz stamps. Not hard, but beautiful results.

Sunday, July 15, 2012

Happy Birthday Hands

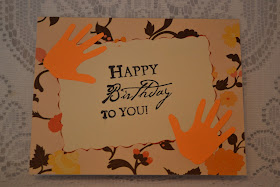
I used punched out hands on this card because on the inside the sentiment says, "How many fingers are you?" I thought it worked well together.

Simple Stampin' Card Day


The first card's embellishment was made by heating a square of Fun Foam with an embossing tool and stamping it with a dragonfly stamp.
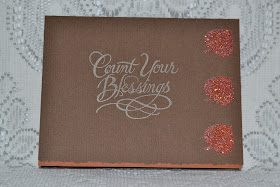
The second card has punched out spots on the right edge and on a separate card I placed a piece of  double sided tape. The separate card is adhered to the inside front and then the double sided tape that shows through is sprinkled with glitter. I also trimmed the bottom of the card front so that the separate card sticks out and creates a contrasting border.

Saturday, July 14, 2012

Vellum Snowman Card

click on photo to view details
I embossed the blue background with a snowflake embossing folder by Sizzix or Cuttlebug, not sure which one. Then I cut a strip of vellum and stamped a snowflake down it and adhered it to the left side of the embossed card front. Then I used ribbon glue (Hobby Lobby) to attach the ribbon and a Glue Dot to Adhere the snowflake embellishment. Then I stamped a snowman on vellum, cut him out and adhered him to the lower right edge. I don't recall what sentiment I put inside...maybe, "Warm Winter Wishes" or some such.

Friday, July 13, 2012

Metallic Marker Technique

click photo to view details
I was just trying the metallic marker technique for the first time. It was a bit streaky here, but okay for the purpose. The more you mess with it the better it gets. I used glossy paper. Fun paper to work with.

Today's Quick card

click on photo to see more detail
The card base is from Hot Off the Press, but I don't know what other companies the stamps, paper and ribbon are from.

The WISH stamp may be a Fiskar's stamp.

Thursday, July 12, 2012

Twinkling H2O Card

click of photo to view details
This photo does not do this card justice! It is a real beautiful card. It is painted with Twinkling H2Os and it shimmers. It hangs in my card gallery because it is one of my favorites. I stamped and embossed 2 stamps from a Hero Arts set of 4. Then I water colored the flowers and backgrounds with the Twinkling H2Os.

Wednesday, July 11, 2012

Sunshine and Sunflower birthday card

http://stampwithtrude.blogspot.com  greeting card by Trude Thoman
click on photo to view details
One of my favorite things, sunflowers, they are so big and bright and look like mini sunshines. In Oregon any little bit of sunshine is appreciated and someone special will love this card.

I stamped the verse and then put the front of the card in a polka dot embossing folder and put it through the Big Shot. Then I tied the ribbon around the card and stamped the sunflower, once on a yellow piece of cardstock and once on a tan piece of cardstock. Then I cut the center from the tan and adhered it to the yellow and adhered the flower to the card. All that is left to do is to choose a birthday sentiment and stamp it in the inside of the card.

Tuesday, July 10, 2012

Spring Card

Quick and easy spring card. I adhered print paper to the front of a card that I cut an inch off the front ONLY. I adhered a strip of coordinating paper to the bottom of the striped paper and used decorative scissors to trim the edge of the card back. Then I stamped the butterfly and the sentiment.
The spring colors add cheer on a gray blustery northwest spring day!

Monday, July 9, 2012

Two Card Day

Birthday Card
Patriotic Card
Today I decided to post 2 cards. The first one I used a square piece of paper to stamp the cake on and then used corner shapers to shape all 4 corners. It reminds me a little of a fancy die cut but this card was made several years ago, before there were all the Spellbinder die cuts available. 

The Patriotic card is not complicated, but I used shimmery paper. All the plain papers are shimmery and then I added the one printed paper. The sentiment is stamped on the ribbon. This card could be used for any patriotic occasion; July 4, Veteran's Day, Memorial Day, etc.

Sunday, July 8, 2012

Shaped Border Card

click on photo to view details
I made this for Wednesday night class to show the ladies how to use a small stamp repeatedly for a border. Then I cut the bottom following the edge of the stamps and put a colored background inside the card to add extra interest to the edge. It is easy to do and the results can be quite good. Try it.
I really like the sentiment, but I can't remember what company it came from (most of my stamps are not mounted on wood, so the company name isn't on them).

Friday, July 6, 2012

Floral swirl card

click on photo to see details
This was made from an idea sheet that I found at Michaels. The only thing I really changed was the background stamp. It is a cute card and didn't need much 'fixing'. Just proves that a single floral stamp can work with the right embellishments.

Thursday, July 5, 2012

Big Shot Card Class Projects

click photo to see details
These are the projects that we are doing this Sunday in the Big Shot Class. There's one more 'surprise' project that I added today. I used the Patio Party Designer Series Paper by Stampin' Up! for the 2 projects on the left. The project on the right is the new In-Color collection by Stampin' Up! The two colors are Raspberry Ripple and Midnight Muse. Since this is a Big Shot class, I also used embossing folders and Big Shot cutting dies on all the projects.

Wednesday, July 4, 2012

Baby girl congratulations card

Here's another fun idea for a baby congratulations. It is a postcard back with a pocket attached and a tag that goes inside the pocket. A ribbon goes through the hole on the tag and buttons are cute embellishments. I used a 1 1/4 inch punch to make the half circle on the pocket.

Tuesday, July 3, 2012

Stampin' Up! Greeting Card

This card was made with a retired Stampin' Up! set. The flower was stamped on a separate piece of paper and fussy-cut then adhered to card front. The sentiment stamp is an Anna Griffin stamp.

Check out what's new at Stampin' Up! Click Here. 

I'd love to be your demo if you don't have one.

Have a blessed day,

Trude

Monday, July 2, 2012

Layered Lighthouse note card

click on photo to see details
This card could be used as a masculine birthday card or can be used as an any occasion card or note card.
You stamp the lighthouse stamp on the base card and then stamp it again on a piece of cardstock that is the same color as the base card. then you cut out a portion of the second stamped image, mat it with a coordinating color of cardstock and adhere it over the original image on the card base. I then inked the edges for more definition and added interest. Quite an easy card, but I like how it turns out. 

Sunday, July 1, 2012

Bold Birthday

I made the outside of this card quick and easy. On the inside I added a pop-up cupcake that I cut with my Cricut.

Thanks for checking it out today!

Trude