Showing posts with label rubber stamping basics. Show all posts

Wednesday, October 7, 2015

Wednesday 101- The Basics

Here's a quick technique that adds a little extra touch to your paper crafts..

It's Faux stitching and you can either use a paper piercer free hand or you can use a template like I did. I used the Updated Basics template pack for these samples.

First I cut a piece of Pretty Petals Designer Series paper into a 2 inch by 6 inch strip. Actually, the paper is already 6 inches so I just cut a 2 inch strip of it. Then I used the Scallop Tag Topper punch to punch one end.
I used the Stampin' Up! pierce mat and paper piercing tool along with the piercing template. I lined up the sentiment down the center of the tag and pierced the holes.
I used a 4 1/4 x 2 1/2 piece of Color Me Irresistible Designer series paper to accent the tag. I sponged it with Real Red ink and then used a tissue to polish the color off the white embossed lines.
Use a White pen to simulate stitching. Here I used Stampin' Up!s white chalk marker.
I cut the green tag down to 4 3/4" and layered it over the Color Me Irresistible DSP. Then I used some fun Christmas ribbon to embellish the tag and finish it off.


Here's a little card I made with the Faux Stitching technique. I used it to accent the piece, both in the center and around the outside edges.


Thanks for stopping by today. I hope you have fun trying this technique on your cards and scrapbook pages.

Have a Blessed day,
Trude

Wednesday, September 16, 2015

Wednesday 101- Rubber Stamping - The Basics

This week I am still playing with my grandson, can you believe it?! Love it!

I wanted to show you the different styles of Stampin' Up! stamps and how to use them. Stampin' Up! made this video for me to share, so it makes my life easier while I have no time to blog. I promise I will have my own material here next week, but these videos are a wonderful resource and I may supplement some of my future Wednesday 101 posts with them.


Stampin' Up! has a new adhesive that just came out with the new catalog. It is fantastic for gluing tiny pieces of paper. Take a look!


Thanks for stopping by today,
Have a blessed day,
Trude

Wednesday, September 2, 2015

Wednesday 101 - Rubber stamping - The Basics

Today's 101- The Basics is about stamping with a rubber stamp!

  • Make sure you have a solid flat surface to stamp on.
  • I like to use a foam mat. There are some sold at craft stores for this purpose, or you can use a piece of fun foam. This is optional but I think that I get better impressions when I use a pad.
  • Place a piece of scrap paper over your work surface. It keeps your surface clean and you can replace it as needed. And Grid Paper (130148) works great too!
  • Make sure your stamp is clean (they will be if you always give them a quick cleaning on the Stampin' Scrub (#126200) after you use them.
  • Select an appropriate ink pad for the paper that you are using.
  • Check the ink pad to make sure that it is clean, remove any debris. 
  • Ink a stamp and stamp it on scratch paper to see if it has enough ink. You will know if the ink pad is too dry by the amount of pressure that you used to ink the stamp. If you had to put any pressure on the stamp to get a good impression on your scrap paper then your pad is definitely too dry and needs to be reinked. If even gentle pressure on the stamp causes there to be overinking on the edges of the stamp then the stamp may have too much ink on it and you can remove some of the excess ink by tapping the surface of the ink pad on a piece of scratch paper, folded in half and half again so that the excess ink doesn't seep through.
  • Lay your stamp on your work surface, face up. Gently tap the ink pad over the surface. Check to make sure the surface is well inked, you should be able to see an even 'glisten' over the surface.          
     
  • For small stamps you can lightly tap the stamp on the ink pad. Try not to get any ink on the edges of the rubber die as it may transfer to your project (when you press too hard, or rock the stamp).
  •  This is what an overinked stamp looks like.
    See the ink above and below the sentiment on the edges of the rubber? Because this is a long narrow stamp it will be easy for me to accidentally rock the stamp as I stamp it on my project. This will create an ink line above or below my stamped sentiment...definitely not what I want.
  • Now you are ready to stamp your project. Grasp the stamp firmly, you would be surprised how easy it is to drop a stamp on the middle of your project! Stamp straight down on your project. Try not to rock the stamp. Use firm pressure, but don't smash it! The larger the stamp you are using, the more pressure you will need to use. In fact I often stand to stamp a large card size image like the one that is in the first photo on this page. 
  • Don't remove the stamp as soon as you stamp it. Wait for a few seconds for the ink to transfer onto the paper.
  • Use one hand to keep the project on the flat surface. Lift the stamp straight off the project. Sometimes the stamps stick to the paper, that's why I hold the project down.
  • Most, but not all, inks dry quickly. If you are using an ink that dries slowly, put the stamped piece aside to dry. I don't know how many times I have hurried on without allowing enough time for the ink to dry and smeared my project.
  • Clean your stamp. You can use an alcohol free wipe, wash it in the sink, or use the Stampin' Scrub. Put your stamp away and it's all ready to use next time!
If your stamped image looks like the ink was not even, it could be that there are manufacturing oils still on the stamp. This happens sometimes with new stamps. You can clean it with dish soap, rinse well, dry the stamp and try again. If you are still getting a spotty image try rubbing your thumb over it. The tiny ridges on your thumb are slightly abrasive, it's like rubbing an eraser over the surface of the stamp, but more gentle. If that still doesn't work, it may be that your stamp has a low spot in the die and is defective. Contact your Stampin' Up! demonstrator (if it's a Stampin' Up! stamp) let your demonstrator know what it is doing and maybe it will need to be replaced.

That's the very basics of stamping. Thanks for stopping by today. I would love to hear your comments and if you have any questions about stamping, please contact me.

Have a blessed day,
Trude

Wednesday, August 19, 2015

Wednesday 101- Rubber Stamping- The Basics

Today is the day to talk about cardstock.


Cardstock is usually available in two different sizes, 12" x 12" and 8 1/2" x 11".


Stampin' Up! carries both sizes but the 12" x 12" are only available in assorted stacks.

Stampin' Up!'s cardstock is:

  •  80 lb stock- a very good weight for card bases, 3D projects and scrapbook pages
  • Very smooth- great for sharp detailed stamped images
  • dyed all the way through, no white core
  • acid free and lignin free
  • matte, non-coated, has great absorbency, works with most ink types
  • comes in 40 classic colors and 10 In-Colors
  • Thick enough so that inks will not show through

 Stampin' Up!'s extra thick cardstock is:

  • 100 lb stock- heavy enough to support multiple layers
  • great for 3D construction projects
  • Whisper White or Very Vanilla
  • Very smooth- great for sharp detailed stamped images
  • acid free and lignin free
  • matte, non-coated, has great absorbency, works with most ink types
  • very thick, ink will not show through
Extra Thick cardstock

Stampin' Up! Kraft cardstock is:

  • thicker that regular cardstock
  • natural Kraft color 
  • 12" x 12"
  • acid and lignin free
  • mat, non-coated, has great absorbency, works with most ink types
  • thick enough that inks will not show through

Kraft cardstock

Besides Stampin' Up! cardstock other cardstocks are available at craft stores. 

Some examples of what you might find:

  •  Linen- has a texture that resembles linen cloth. This cardstock can be stamped on but you should stamp on a sample piece with your stamp to check the quality of the stamped image before stamping on a finished piece. Most linen cardstock has a matte finish and will accept most types of ink.
  • Glossy- has a coating that gives it a high gloss. This cardstock gives a high quality stamped image because of its smoothness, but not every type of ink can be used on it. Dye inks and solvent inks work best but pigment inks will work if heat embossed. Chalk inks and Brilliance inks need to be heat set. Make some samples with the stamp and ink you are planning to use. Some stamp and ink combinations will slide around on this paper, so practice is recommended.
  • Pearlescent and metallic- These papers usually have a very smooth surface and are not as absorbent as a matte cardstock. Solvent inks are great, chalk inks and Brilliance can be heat set, test other inks for suitability before stamping the finished project.

Some things to think about when you choose cardstock for a project:

  • What type of ink do you plan to use for this project? Is the cardstock appropriate for that type of ink?
  • How absorbent is the paper? Will you need to heat emboss the ink or heat set it so that it will dry? Or is it so absorbent that you need to use a thick ink, for example craft ink, so that you have time to apply the embossing powder if you plan to heat emboss? 
  • Density- If you plan to tear it, will it tear easily? If you are using it for a card base with multiple layers is it heavy enough to support them? If you are planning to layer it with other papers will it add too much thickness/weight to the project?
  • Texture- Will it be easy to get a clear stamped image? Will the texture enhance your project or detract from it?
  • If you want your project to be archival, is it acid free and lignen free?
  • Does it have a white core? Do you plan to use that to enhance your project or would a cardstock that is dyed all the way through be more appropriate for this particular project?

 Next week we'll be talking about other types of papers that are available.

Have a blessed day,
Trude

Wednesday, August 12, 2015

Wednesday 101- Rubber Stamping- The Basics

Part 2- Adhesives


I want to emphasize that this is not an exhaustive list of adhesives. There are many out there and new ones on the market every day. But this list is the basics plus a few extra.

Last week we talked about liquid adhesives and this week I am concentrating on adhesives that are not in a liquid form.

Adhesive Transfer Tape:

This type of tape is usually on a paper liner on a roll. Stampin' Up! calls theirs Snail Tape and Fast Fuse (very strong holding product). Tape on a roll is also known as Tombow, Tape Runner, roll tape. There are many names for it and many brands out there. Try several to see which one works best for your usage.

snail Tape 
Fast Fuse

Glue Dots-

These are round dots of glue that are on a liner like the roll tape. They can actually be on a roll, in a roll applicator or on clear sheets. The dots can be flat or raised for 3D effects and come in various sizes. Stampin' Up!s come on a roll and are the mini dot size which is very versatile. They are also flat. Glue dots provide a very strong adhesion. They work very well for adhering ribbon, bows, buttons and other embellishments.

Glue Dots

Foam Mounting Tape-

These are used to add dimension to projects by adding some additional height to layers and embellishments. Sometimes they are also known as Pop-Dots and Stampin' Up! brand it called Dimensionals. They come in various thicknesses and shapes. Stampin' Up!s is hexagonal and is not as thick as some which can be an advantage when shipping items in the mail. On other projects you can use them 2 high to get more dimension.

Dimensionals

Double Sided Liner Tape-

This type of tape comes on a roll, but instead of having a liner on one side it has a liner on both sides. The advantage of this is that you can measure and cut a line of adhesive, remove the liner on one side and place the adhesive exactly where you want it before you remove the other liner and attach items to it or attach it to other items. Some names you may know it by are Sticky Strip, Red Line Tape, or Stampin' Up!s new product Tear and Tape. This tape works great for use with foiling effects, adhering tiny beads and glitter besides holding 3D projects together and adhering layers of paper. It has strong adhesion.

Tear and Tape


Other useful adhesives in this category are:
Repositionable tape which usually comes in a tape runner and is useful for projects where you need to temporarily line up several items before adhering them permanently. The tape is repositionable but becomes permanent after 24 hours, however I always adhere it with a stronger permanent adhesive after I am satisfied with my arrangement.
Dot runner tape is useful when you are adhering items that have open spaces because the dots will only adhere to the places that it comes in contact. I like to use it to adhere Stampin' Up! Tea Lace Doilies to my projects.
Vellum Tape is a product that is suppose to adhere vellum to other surfaces without showing. I have had mixed results with this product. I prefer to use brads or glue dots that are concealed on the outside with bows or buttons or ribbons.

If you have favorite adhesives or added comments I invite you to join the conversation by commenting on this blog post!

Have a blessed day,
Trude


Wednesday, July 15, 2015

Wednesday 101- Rubber Stamping- The Basics

This week's topic is a continuation of last week's topic. Last week we discussed the different types of ink and examples of each. This week we are going to talk about storage and maintenance of your ink pads.

For ink pads as with stamps, and probably even more critical, proper storage is important. Ink pads should be stored in cool dry places away from heat sources.

The general recommendation is that pigment, resist, craft and embossing pads should be stored upright as the ink is thicker and doesn't tend to migrate toward the bottom of the pads, but will sit too thickly on the surface if stored upside down. And for dye ink and solvent ink the pads should be stored upside down to keep the ink on the surface of the pad. Stampin' Up!s flip top case design automatically stores pads upside down.

To extend the life of your ink pads you should always try to purchase an in refill when you purchase a stamp pad. Stampin' Up! sells ink refills for every ink pad they sell.

Many people who create with rubber stamps have felt top ink pads and have learned to bang and twist the stamps on the ink pads when they are inking the stamp for use. Usually you do not need to bang and twist. If you find yourself banging the stamp on the pad to get it fully inked this can be an indication that the pad is dry and needs to have more ink added from the refill bottles
.

With foam pads, including Stampin' Up!s dense foam pads, it is best to tap the ink pad on the stamp rather that tapping the stamp on the pad. This allows for better visibility of the surface that is being inked and also allows greater control of the pressure when inking the stamp. One very important thing to remember when using a foam pad to ink the stamp is Never Twist The Stamp On The Pad!!! I can't emphasize this too much because twisting a stamp on the surface of the foam pad as you ink it will destroy your pad, it cannot be repaired. I have witnessed the destruction of ink pads from this method of inking.

Adding ink to a pad is easy. Use zigzag movement horizontally from top to bottom of pad lightly squeezing ink as you go. Then repeat the zigzag vertically from left to right. When you have completed the zigzags in both directions you can use the bottle tip to go over the pad lightly with small circles to encourage the ink to go into the pads. That's all there is to it!

bottles of ink to refill pads
 

Wednesday, July 8, 2015

Wednesday 101- Rubber Stamping- The Basics

Hello,
Welcome back to Wednesday 101- The Basics. Today we are going to look at another very important element of rubber stamping...Ink pads.

 There are quite a few types of inks and I'm sure I won't cover every one in this blog post, but I will get to the main ones and a couple extra.

 Each stamp pad fits into a particular category; Dye-based ink, Pigment ink, embossing/resist ink, craft/fabric ink or solvent (permanent) inks.

Dye-Based inks are water based and not as permanent as other inks. In fact some of these inks are created specifically so they will wash out and suggested for children's use. Traditionally felt pads were always used with dye-based inks, however some companies, Stampin' Up! for example, have switched to dense foam pads in their Classic Stampin ink pads. Dense foam pads are known for their ability to create sharp stamped images. This type of ink comes in the widest range of colors, they dry quickly and work well on vellum, matt and glossy papers. Dye inks are not recommended for use with heat embossing as they dry too quickly to hold the powder in place until it can be melted with a heat tool.

Pigment inks are thick, don't come in quite the color range as dye inks and are most often found with foam pads. Traditionally these types of inks took a long time to dry, and still most pigment inks have a longer drying time. But some pigment inks are now formulated to have a quicker drying time. Most fast drying pigment inks will have that noted on the label, so check the label when you buy pigment inks so that you purchase the one that is suitable for your purpose. Because of the slow drying time pigment inks are an excellent choice for heat embossing as they will hold onto the embossing powder long enough to be melted by the heat tool. When you use pigment ink on glossy paper it MUST be embossed as it will not dry, or soak into a glossy surface (the exception is Brilliance inks which we will talk about later).

Embossing/resist Inks are thick, slow drying inks that are formulated especially for embossing with opaque and metallic embossing powders and as a resist on glossy paper. They come in foam pads and are either clear or lightly tinted. Resist ink can be used to achieve a tone-on-tone effect. The ink pad that Stampin' Up! sells in this category is VersaMark watermark ink.

Craft/Fabric inks are usually formulated for use on fabric, however some are multipurpose and can be used on fabric, paper, wood, acetate, glass, metal and shrink plastic. Craft/Fabric ink needs to be heat set to become permanent in fabrics. Heat setting is also recommended on wood. Craft/Fabric ink is a type of pigment ink and is slow drying. Plenty of drying time should be allowed on nonporous surfaces. Stampin' Up! sells Whisper White craft ink, which can also be used to create chalk effects on dark papers and as an embossing ink.

Solvent/permanent inks are available in water-based and solvent based forms. They are quick drying and require special cleaners to remove from surfaces (in other words, not the best choice for children). This type of ink can be used on almost any surface. The water-based type ink pad is good for use with alcohol-based colored markers and the solvent-base pads work the best with water-based markers. Stampin' Up! carries both types of ink pads; solvent- Jet Black Stazon, and water-based- Memento Tuxedo Black.

Here are examples of the various types of inks
Classic Stampin' pad

Stampin' Up!s Classic pad is dye based, quick drying, comes in 46 colors. It is non-permanent and works great on matte, vellum, and glossy card stocks and papers.The ink is translucent and is in a thick raised foam pad. When closed the pad is upside down in the case so that the ink stays on the surface of the pad. The ink is acid free.


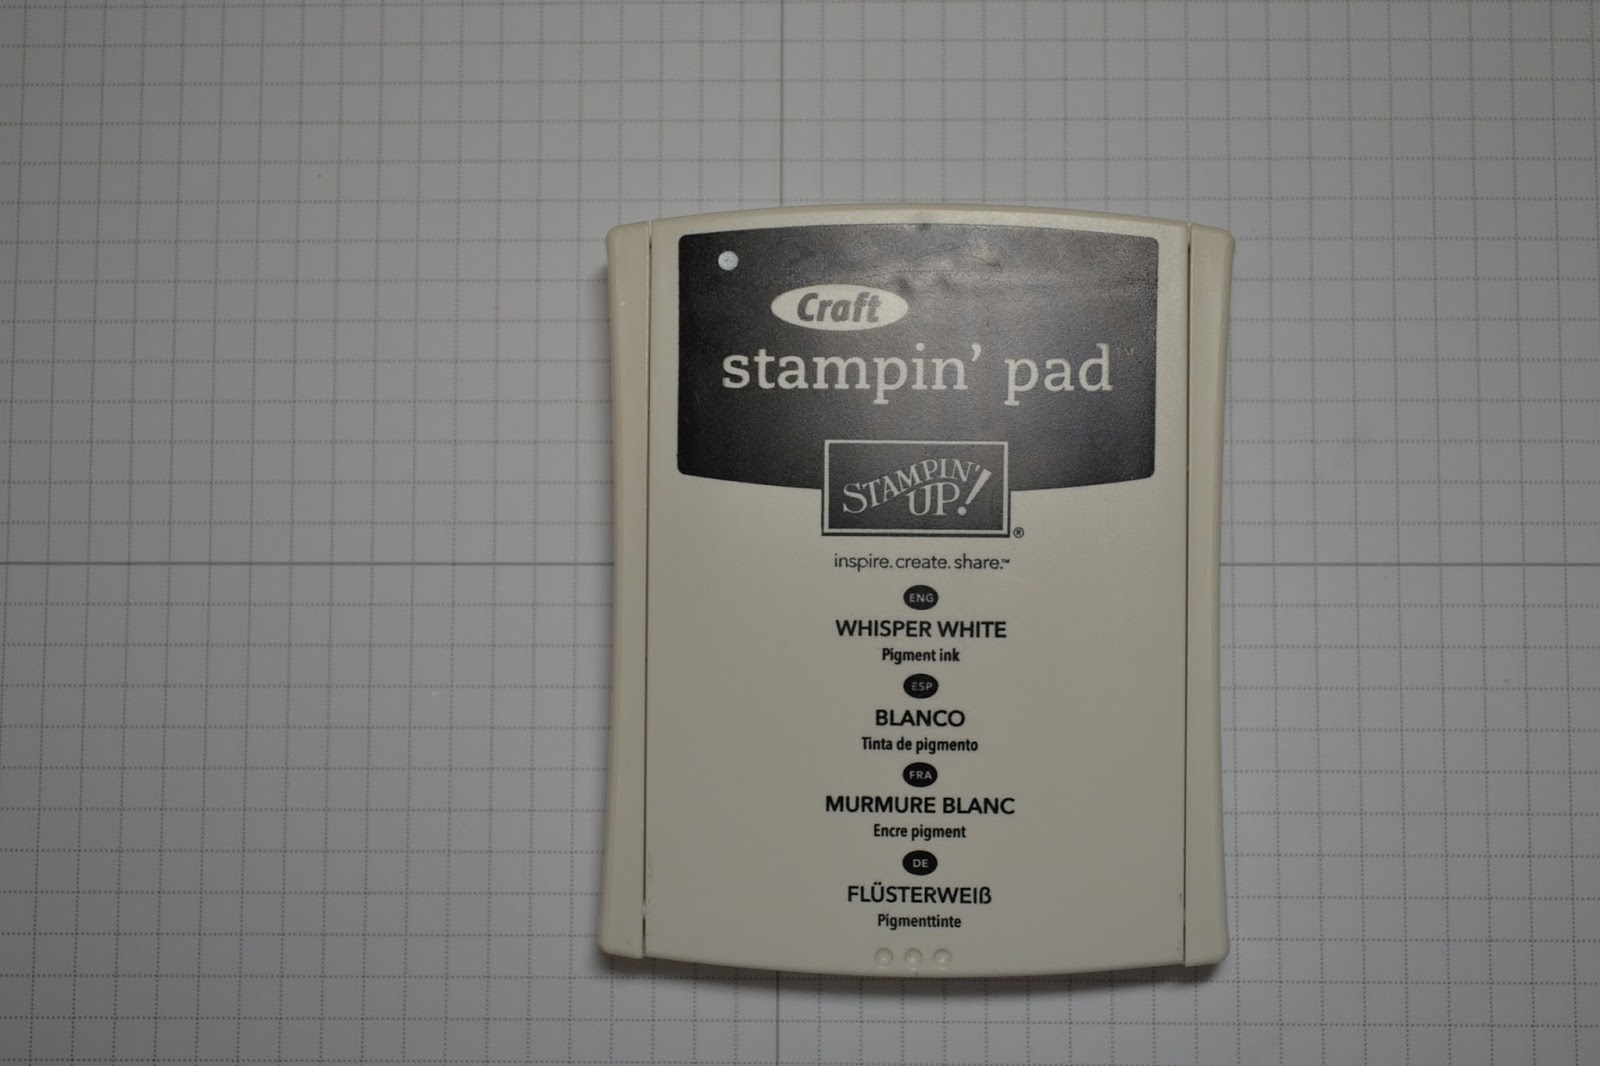
Craft Stampin' pad

Stampin' Up's Craft pad is pigment based, slow drying, and comes in Whisper White. The pad is made of foam. It works on most surfaces and is permanent when heat embossed. The ink is acid free.


VersaMark Watermark stamp pad

Stampin' Up! sells VersaMark watermark ink pads by Tsukineko. It is a resist ink pad that is slow drying and non permanent. The pad is made of foam. It works best on matte card stock and paper or on glossy paper as a resist. Use to create tone-on-tone background designs. This ink can be used as an embossing ink with embossing powder and a heat tool and is acid free.


Stazon Solvent ink pad

Stampin' Up! sells Stazon Solvent ink pads by Tsukineko. It is a permanent solvent-based ink that is fast drying and permanent. The pad is felt. It works well on most surface although it is not recommended for fabrics. This is the ink to use when coloring with water-based markers as it resists bleeding. Use this pad in a well ventilated area. This ink is acid free.


Memento Permanent ink

Stampin' Up! sells Memento ink pads by Tsukineko. It is permanent and fade resistant. It is quick drying and the pad is felt. It works on matte, glossy and vellum card stocks and papers. This ink resists bleeding and is great to use with alcohol based markers. This ink is acid free.


Brilliance ink pad
Remember I said we would talk about Brilliance ink pads? Well, they are not available through Stampin' Up! at this time, but they are one of my favorite inks. They used to be in every craft store and were available in many colors. Now the selections are very limited in stores, but I believe they can still be purchased online. I like these inks because they are what I call an all-purpose ink. They are pigment inks that dry fairly quickly and don't usually require heat setting. But they can also be used for embossing! The pads are foam and the ink is fade resistant, 
acid free and child-safe and can be used on almost
 any surface including photos and vellum. This is
                                                                                       also a Tsukineko product.


Color Box Fluid Chalk ink

This ink is not available through Stampin' Up! at this time, although it was available earlier this year in the Occasions catalog.
Chalk ink is a pigment ink that dries quickly and is permanent when heat set. The ink pads come in various sizes and colors. This ink has an opaque matte finish when dry and works well on dark papers for chalkboard effects. This ink is a product of Clear Snap.


I hope you've enjoyed this short tour of various inks that are available. There are so many more, but these are the ones that I use most often.

Have a blessed day,
Trude