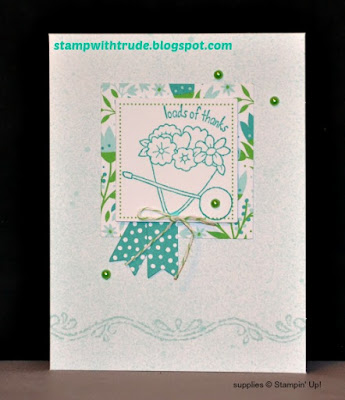
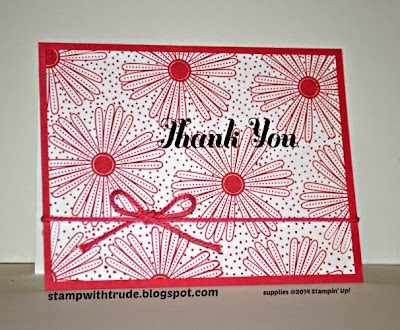
I know a few people who make Thanksgiving cards and send them out, but it is too much work to do cards for Thanksgiving and Christmas (IMHO). But this set can be used for fall cards that say thank you to special people in your life. It is always good to be thankful and we need to incorporate it into our everyday lives, not just at Thanksgiving time.
I'm thankful for you...the people all around the world, who take time to look at my blog to see what I have crafted, who occasionally leave a comment of encouragement or commendation and who place orders through my Stampin' Up! store so that I can continue to create cards and post tutorials for you. Thanks!
This set is called, Truly Grateful.
Have a blessed day,
Trude
Showing posts with label thank you card. Show all posts
Showing posts with label thank you card. Show all posts
Thursday, September 21, 2017
Friday, April 14, 2017
Friday Friend Share
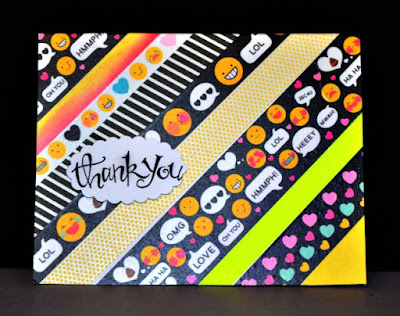
Here is a very fun thank you card. Just like last week's card, this one uses Washi tape to embellish and add interest. Isn't it cute?
Thanks Kim, for sharing this cute card with me.
Have a wonderful weekend everyone!
Trude
Thanks Kim, for sharing this cute card with me.
Have a wonderful weekend everyone!
Trude
Tuesday, January 31, 2017
Tuesday Tutorial # 80
For today's Tuesday Tutorial I used the Detailed Floral Framelits and the Floral Phrases stamp set. I haven't used this bundle much yet. I look forward to doing more cards with it.
You can get the tutorial now by using this link.
Have a blessed day,
Trude
You can get the tutorial now by using this link.
Have a blessed day,
Trude
Sunday, July 17, 2016
One Big Meaning with Swirls
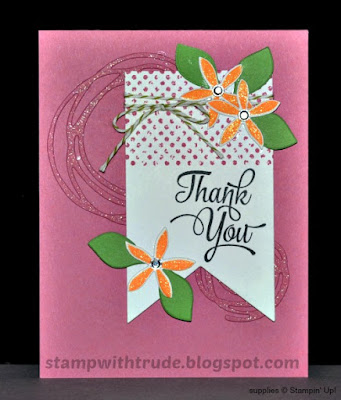
How much have you been using the Wink of Stella? Have you used several tubes? I am sure trying to use mine as much as possible because it adds that special touch and just brings almost every project up a notch. I used it on the swirly scribbles die cuts on this card.
The card base is the new Sweet Sugarplum In-Color. I like is a lot. It has red undertones instead of the blue ones in the Wisteria Wonder.
The sentiment with the beautiful font is from the One Big Meaning stamp set. The dots are from the Timeless Textures set and the die cut flowers and leaves are from the Flower Fair framelits set.
 |
| Swirly Scribbles thinlits |
 | |
| One Big Meaning stamp set |
 |
| Flower Fair framelits |
Sunday, July 10, 2016
Flourishing Phrases CAS thank you card
The first card that I have created with the Flourishing Phrases stamp set. I used the new In-Color Sweet Sugarplum.
I used Basic Gray cardstock at the card base and I think it makes a great frame for this clean and simple design.
I used Basic Gray cardstock at the card base and I think it makes a great frame for this clean and simple design.
Tuesday, June 28, 2016
Tuesday Tutorial # 50
Tuesday Tutorial on Wednesday!
You can get the tutorial now by using this link.
Have a blessed day,
Trude
 |
| You're Sublime stamp set |
You can get the tutorial now by using this link.
Have a blessed day,
Trude
Thursday, June 2, 2016
Circle of Spring Thank You card Meets Pop of Pink
I'm finally using this stamp set. It is one of the last ones that I bought before the new catalog showed up in my mail box.
I decided to make a similar card to the one that is in the 2016 catalog. I just updated the paper to the new Pop of Pink Designer Series Paper. This chevron paper is black and white and you can add any color to it, so of course I added Melon Mambo for that true Pop of Pink.
I used a Stampin' Spritzer to apply the color to the Designer Series Paper strip, but you could also sponge it on or brayer it on to get the same effect. I also spritzed some of the Melon Mambo onto the Whisper White cardstock to add interest to the 'white space'.
 |
| Circle of Spring |
Thursday, May 12, 2016
Boys Will Be Boys Thank You card
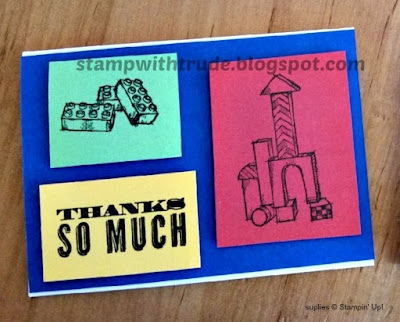
Today I am going to share a card that my daughter-in-law made to send to the children that came to my grandson's birthday party.
She used the Boys Will Be Boys stamp set from Stampin' Up! It was perfect because he loves Lego! I don't think there are many boys that don't. Even my boys like Legos, and they are all grown up!
This Boys Will Be Boys stamp set is going away at the end of the month, so get it while you still can! It is even on sale right now.
 |
| Boys Will Be Boys stamp set (link) |
Tuesday, May 3, 2016
March Paper Pumpkin Remake
I just figured out that I hadn't shared the March Paper Pumpkin with you. This is my version of the kit, which is a little different than the actual kit. You can see the actual kit on Pinterest or You Tube.
The kit came with cards that were meant to be for birthdays or other occasions when a person would include gift cards. The small ones are the actual gift card holders. I created them to use separately. The large card became a Thank you card because I use quite a few of them ☺. Have to thank my great customers, you know!
I used the You're Sublime stamp set that will be carrying over to the next catalog. The border at the bottom is the chalk lines stamp set and it is on the retiring products list.
Sorry I don't have a current Tuesday Tutorial for you this week. I may or may not be able to get one posted this week. It is one of THOSE weeks. I did get my Stampin' Up! Preorder sent in today for the new annual catalog! Can hardly wait to get my hands on some new colors and products!
Have a blessed day,
Trude
Wednesday, March 9, 2016
Mojo Monday 438 World of Thanks Card
I thought I would check out the Mojo Monday sketch today. It's a good one, as usual, so I decided to see what I could do with it.
I have too many stamps that I have never used. So, today I pulled a couple of sets out and created this card.
I used several greens. The card base and shamrock are Mossy Meadow. The circle and sentiments are Cucumber Crush.
Did you know that you can add color along the edges of the gold and silver ribbon? I didn't, but I tried it and it seemed to work quite well.
This is the first time that I used the White Perfect Accents. I really like them. I'm going to have to buy more of them! Maybe it will be one of the items I offer for free, with a $50.00 order, sometime in the near future.
I used a Sharpie to color it green and added it to the center of the shamrock.
Have a blessed day,
Trude
I have too many stamps that I have never used. So, today I pulled a couple of sets out and created this card.
 |
| Mojo Monday 438 |
I used several greens. The card base and shamrock are Mossy Meadow. The circle and sentiments are Cucumber Crush.
Did you know that you can add color along the edges of the gold and silver ribbon? I didn't, but I tried it and it seemed to work quite well.
This is the first time that I used the White Perfect Accents. I really like them. I'm going to have to buy more of them! Maybe it will be one of the items I offer for free, with a $50.00 order, sometime in the near future.
I used a Sharpie to color it green and added it to the center of the shamrock.
Have a blessed day,
Trude
 |
| Banner Blessings |
 |
| A World of Thanks stamp set |
Tuesday, February 9, 2016
Tuesday Tutorial # 32
I'm enjoying the stamps, paper and embellishments in the new Sale-A-Bration brochure, how about you? And they are free with a minimum purchase from the Annual catalog and/or the Occasions catalog.
For this card I used the Wildflower Fields Designer Series paper and the coordinating Flowering Fields stamp set.
You can get the tutorial now by using this link.
Have a blessed day,
Trude
Wednesday, November 25, 2015
Wednesday 201- Beyond the Basics- Big Shot
Here's another way to add dimension and interest to your stamped card creations. Use a Big Shot. You can use it to add die cuts, or as in this example actually die cut the card itself. You can also use it to pressure, or cold emboss. You can also see that in this example; I used a woodgrain embossing folder to add texture and interest to the front of the card.
I used the Thankful Forest Friends stamp set.
Here's a good Big Shot demonstration video by Stampin' Up!
I used the Thankful Forest Friends stamp set.
 |
| Thankful Forest Friends stamp set |
Here's a good Big Shot demonstration video by Stampin' Up!
Thursday, August 13, 2015
Throwback Thursday # 10
Summer is flying by so quickly! Some children are already returning to school!
For today's Throwback Thursday card I chose a retired Stampin' Up! stamp set called The Fine Print. All the stamps have some fine print on them like this bee stamp I used. There are several others including a baby bib with fine print for the strings and a gift package with fine print for the ribbon.
I only used two retired things to make this card; the bee stamp and the word bubble framelit.
In the new Stampin' Up! stamp set, Garden in Bloom, there is a cute bee and there is also some really cute bee paper to go along with it in the English Garden Designer series paper stack.
Have a BEE-utiful day!
For today's Throwback Thursday card I chose a retired Stampin' Up! stamp set called The Fine Print. All the stamps have some fine print on them like this bee stamp I used. There are several others including a baby bib with fine print for the strings and a gift package with fine print for the ribbon.
I only used two retired things to make this card; the bee stamp and the word bubble framelit.
Retired products
- The Fine Print Stamp set
- Word Bubble framelits
Current products
- Basic Black card stock
- Crushed Curry card stock
- Whisper White card stock
- Tin of cards stamp set
- File Tabs Edgelits
- Hexagon Hive thinlits
- Honey Comb embossing folder
- Memories Black ink
- Basic Black Stamp-n-Write marker
In the new Stampin' Up! stamp set, Garden in Bloom, there is a cute bee and there is also some really cute bee paper to go along with it in the English Garden Designer series paper stack.
 | |
| Garden In Bloom |
 |
| English Garden Designer Series Paper |
Have a BEE-utiful day!
Thursday, July 23, 2015
Throwback Thursday # 7
This Throwback Thursday card is created with a Stampin' Up! stamp set from 2001 called "Thank You Blocks".
Retired product that I used on this card are Whisper White Thick Baker's twine, Champagne glimmer paper and the thank you stamp.
Other supplies:
Blushing Bride card stock, Vellum, Blushing Bride reinker to dye the twine, White craft ink to emboss the sentiment, 1/8" and 1/4" circle punches, English Garden Designer Series Paper
Thursday, April 2, 2015
Paper Pumpkin remake # 8 Greeting Card
Here's yet another remake of Stampin' Up!s March Paper Pumpkin kit.
I used the Painted Petals flower stem to stamp along the bottom of the card and I also used one of the sentiments in the same set to stamp above the YOU.
I sponged the card base with Wild Wasabi ink, used a Wild Wasabi marker for the sentiment and also stamped the flower stems with Wild Wasabi.
I used some scraps from my scrap bin to punch the flowers from. I think I used Cherry Cobbler card stock, Real red card stock and Calypso Coral. I used the Boho Blossom punch.
Thanks for stopping by today,
Trude
Monday, March 30, 2015
Thank You Card Paper Pumpkin Remake # 5
This card has just two modifications to the original. They are simple modifications that make the card quick and easy to create.
Instead of stitching the YOU with the yellow embroidery thread, I colored it with Pool Party markers. I also sponged Pool Party ink on the front of the card, heavier on the edges and lightly toward the center.
The Paper Pumpkin kit includes this "Thank" stamp and the one on the inside also. Inside the card it says, "You're a gem" which goes along with the little Pool Party colored gem that is included with the kit.
Thanks for stopping by!
Trude
Thursday, July 31, 2014
Mixed Bunch Thank You Card
I still have my pink paper out and my Mixed Bunch stamp set so I thought I would make a quick card. I know it doesn't look real quick because you have to do all the dots between the flowers with a Stamp-n-Write marker. So here's an idea...cut the white card stock (4" x 5 1/4") and stamp the flowers with Strawberry slush ink. Do half a dozen of them, the stamping goes real quick. Now, put them in a protective envelope and put them in your purse along with the Strawberry Slush Stamp-n-Write marker. Now when you are sitting and waiting for an appointment, or for you child to get out of whatever activity they are involved in, pull out the cards and start dotting away!
It is easy to switch up the sentiment too. Just use a sentiment that is bold enough to stand on its own with the big pink flowers.
Here's the short list of products I used:
Paper- Whisper White card stock, Strawberry slush card stock
Ink- Strawberry Slush, Jet Black Stazon, Strawberry Slush Stamp-n-Write marker
Stamp Sets- Mixed Bunch, Many Thanks
Embellishments- Strawberry Slush Thick Baker's twine
I'm here for you if you are looking for a Stampin' Up! demonstrator. Let me know if I can help you.
Comments are appreciated, I'd love to hear from you.
Thanks for stopping by and have a wonderful day,
Trude
Wednesday, May 28, 2014
Pleasant Poppies Thank You Card
This card is for The Paper Players sketch challenge #197. It is a clean and simple sketch. I used Stampin' Up! Pleasant Poppies stamp set and kept it clean and simple (CAS).
This is the sketch.
I used:
Paper- Polka Dot Parade DSP, Whisper White c.s., Old Olive c.s.
Ink- Old Olive, Rich Razzelberry, Jet Black Stazon
other- Artisan Label punch, Starburst Framelits, Prismacolor colored pencils, EK ribbon punch.
You can purchase these products at my 24/7 Stampin' store, just click on the item below.
Thanks for looking!
Trude
Thursday, March 27, 2014
My Paper Pumpkin Thank You Card
This month Technique Time Tuesday had an interesting Technique to share. I created the card, but didn't ever get it linked to their blog. I have been too busy dealing with things concerning the accident that my husband was in at the beginning of March.
Still, I thought I would share it with you because I hadn't seen it before. They call it "Caught in Crystal". Here is the card I created for the challenge. You should go check out their blog and see all the cards people created.
There is a tutorial on Technique Time Tuesday that explains how you create the "Caught in Crystal" piece so I will only explain it briefly.
Use a 3" x 3" piece of window sheet. Stamp with Stazon ink on the front. When it is dry, turn it over and coat the back side with Crystal Effects. You can add a drop or two, depending on the intensity of the color that you want, of reinker and blend it into the crystal effects. Now lightly sprinkle some glitter over the crystal effects. Stamp a "background" image onto 3 x 3 inch tissue paper, turn it over and stick it onto the crystal effects. Press it gently into the crystal effects then let it dry and use it for your art piece on a card. That's basically the process.
The supplies I used were mostly from the March Stampin' Up! My Paper Pumpkin kit.
If you would like to try out My Paper Pumpkin you can click here
I hope you try this technique.
Have a great day!
Trude
To my Stampin' Up! online store
To my Star Crafter Club
To Contact me
Tuesday, March 4, 2014
The Paper Players Spring Thank You Card
Okay, so maybe the ship card wasn't the best example of a spring thank you card. When you think of spring, you think of colors that are light and bright, not browns and blues. So, here's another go at the spring thank you card for the Paper Players Challenge.
What do you think; is that better?
I Used the Hardwood stamp (again) to create the 'planter' for the poppies. The poppies stamp is called Pleasant Poppies. Both the Hardwood stamp and the Pleasant Poppies are by Stampin' Up!
I chose to color these poppies with colored pencils. It has been quite a while since I pulled out my colored pencils. I should use them more often. I've always enjoyed coloring. I can still remember my first color book and pack of crayons. I think I got them for Christmas when I was 5 years old. It was a Disneyland color book with pictures of Mickey and all his friends. That was a few years back, but that's what an impression it made on me!
Subscribe to:
Posts (Atom)

