Today's Beyond the Basics is about using vellum to enhance your paper projects.
This post is barely scratching the surface of vellum. If you are on Pinterest you can put vellum in the search box and find many more ideas for incorporating it into your projects.
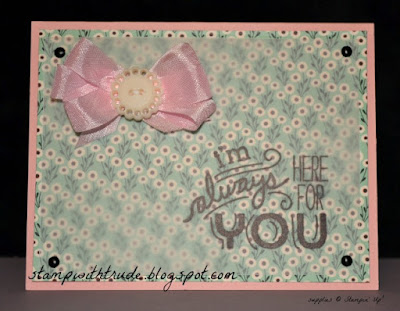
On this sample card I used a printed vellum from Stampin' Up!s Fall catalog. To attach vellum to your projects you have to get creative because glue and snail tape will show through, and it doesn't enhance the projects. I stitched the vellum to the card stock for this sample. The printed vellum is a quick way to add interest to your backgrounds and it tones down whatever you put it on so you can use a brighter card stock and the card won't be overwhelming.
For this next sample I used the vellum as an overlay to tone down a busy print. I stamped the sentiment directly on the front of the vellum with Stazon ink. With vellum you can't use just any ink pad you have sitting around. Most Pigment type inks will not dry on vellum. If you want to use a pigment pad you can sprinkle on embossing powder and emboss it. Brilliance inks are the exception. For Brilliance inks all you need to do is dry it with your heat tool. You can use most dye inks but even some of them aren't suitable. Some dye inks tend to 'run' on the surface and make a 'halo' around the stamped image. Not what you want to see. That is why I generally use Stazon ink, if I am not planning on heat embossing.
My advice about inks is to try a sample stamp with your ink and vellum and see how it reacts.
To attach the vellum to the card I used brads in the corners.
I stamped this with VersaMark ink and then sprinkled on the embossing powder and heat embossed it. Heat embossing on vellum can be tricky. Vellum warps and scorches easily. Sometimes heating the vellum from the backside and then heating on the front side works well. I advise practicing first before creating your project. Then you will be able to see how your ink, embossing powder, vellum and heat tool interact, and you'll be able to figure out the technique that works best for you. I strongly recommend using an Embossing Buddy on the vellum before stamping on it.
After that I flipped it over and used markers to color in the flower. This makes a quick elegant card. If you experiment with this method you can get a faux watercolor effect that is quite nice.
To attach the vellum on this card I cut the vellum longer than I needed it and then wrapped it around the top and bottom of a white card and attached it to the back of the white card. Then I attached the white card to the colored card base.
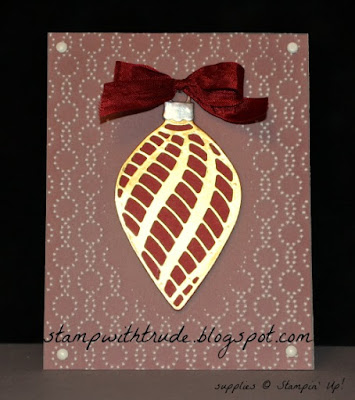
Finally, I used an embossing folder with this piece of vellum. You can get some very beautiful effects by putting vellum in embossing folders and running them through your Big Shot. It adds texture and interest, and again the vellum tones down the strong color of the background (Cherry Cobbler).
I hope you have enjoyed this tiny look at how vellum can enhance your projects. I may have to do a part 2 to show you more, because there are so many more things you can do!
Thanks for stopping by!
Have a blessed day,
Trude


No comments:
Post a Comment
Leave a comment Here!