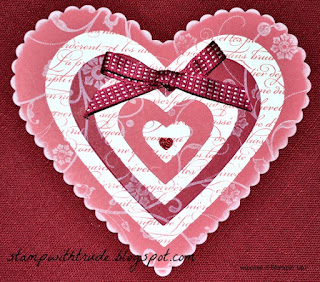
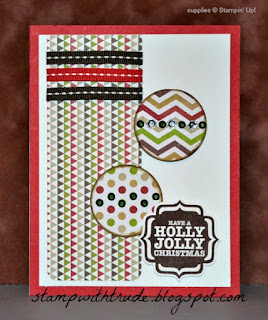
Monday, December 28, 2015

Journal It! # 178

Journal It! 178

Here's an interesting journal prompt:

Describe where you were and what you were doing the day the Berlin Wall fell.

Write the prompt in your journal and Journal It!

Some of you may not be old enough to write about this. Personally, I am old enough, but I don't remember what I was doing the day it happened, so I would have to write about what significance the event has to my life, the world, etc.

Greetings From stamp set

Saturday, December 26, 2015

Journal It! # 177

Journal It 177

Another prompt for you to concider-

What were some of the birthday traditions your family had when you were a child?

Write the prompt in your journal and Journal It!

Sprinkles on Top stamp set


Check out the new Hostess Code Gift offer 

Have you had a chance to check out the deals this week?

Friday, December 25, 2015

Journal It! # 176

Journal It 176

Here's the next prompt for your journal:

What were some of the Thanksgiving traditions your family had when you were a child?

Write the prompt in your journal and Journal It!

For All Things stamp set


Check out the new Hostess Code Gift offer 

Have you had a chance to check out the deals this week?

Tuesday, December 22, 2015

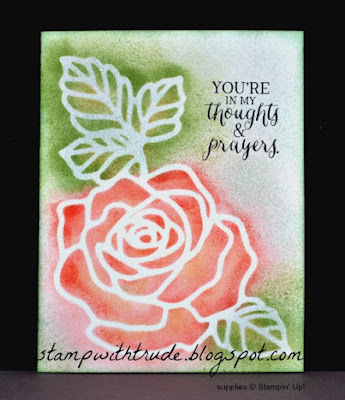
Tuesday Tutorial # 28 Rose Garden Stenciled Card

Are you still trying to get everything done before Christmas? Ya, me too. Then there will be little time to enjoy it...it will be all over and done for another year!

Here's another sneak peek for you. This time it is a thinlits die set from the upcoming Spring Occasions catalog.

Stamp With Trude, Rose Garden Thinlits, Rose Wonder stamp set, Stampin' Up!, 2016 Occasions catalog, sneak peek, encouragement card, stenciled card
Rose Garden Stenciled Card

Download the tutorial now 

 Have a blessed day, 

Trude 

Monday, December 21, 2015

Journal It! # 175

Journal It! 175

The next prompt for you...

What birthday traditions did you have for your children?

Write the prompt in your journal and Journal It!

Sprinkles of Life stamp set


Check out the new Hostess Code Gift offer 

Have you had a chance to check out the deals this week?

Sunday, December 20, 2015

Scrapbook Sunday # 28

This week's page is the companion page to last week's. I repeated the button theme and added lace and a bow.

This is a 12" x 12" page and the photos are matted together on a piece of vellum. The vellum frames the photos and makes them the focal point. The simple rows of buttons and lace don't overpower the focal point.

You can find scrapbooking supplies at my 24/7 Stampin' Up! store.


Saturday, December 19, 2015

Journal It! # 174

Journal It! 174

The next prompt for you is...

What invention would you not want to live without? Why?

Write the prompt in your journal and Journal It!

Guy Greetings

Check out the new Hostess Code Gift offer 

Friday, December 18, 2015

Journal It! # 173

Journal It! 173

The journal prompt for today:

What is your favorite tree? Why?

Write the prompt in your journal and Journal It!

Lovely As A Tree stamp set

Check out the new Hostess Code Gift offer 

Have you had a chance to check out the deals this week?

Thursday, December 17, 2015

Throwback Thursday # 28 Painted Garden Greeting Card

It's time for another Throwback Thursday card creation using a retired Stampin' Up! stamp set. Today I chose Painted Garden and created this card. The card is 5 1/2" x 5 1/2"

Painted Garden, Throwback Thursday, Stampin Up, Stamp with Trude, Trude Thoman, greeting card, floral


Retired products I used:
Painted Garden stamp set
Essentials piercing pack
Wonderful you stamp set- sentiment

Current products I used:
Rose Red card stock
Rose Red Classic Stampin' ink pad
Pink Pirouette Classic Stampin' ink pad
Cucumber Crush In-Color Stampin' ink pad
Daffodil Delight Classic Stampin ink pad
Mememto Tuxedo Black ink pad
Whisper White card stock
Washi Tape punch
1 1/4" scallop circle punch

Have a Blessed day,
Trude


Wednesday, December 16, 2015

Wednesday 201- Beyond the Basics

I mentioned the Rule of Three last week so I thought I would talk about it a little more today.

Here is the definition and a discussion of the Rule of Three on Wikipedia.

So, the rule states that there are two parallel horizontal lines that divide the space into three equal parts and there are two parallel vertical lines that divide the space into three equal parts.

Let's look at some card examples to see how I have used this rule. I created a grid from clear plastic to put over the cards so that we could "see" the equal space more easily.

This card fits the Rule of Three quite well. The card is divided into three vertical spaces, although they are not quite equal. The card is also divided into three horizontal spaces, very close to equal. The other composition strong point is that the wreath follows the horizontal and vertical lines. 

This card has three divisions of the vertical space.

This is another example of the space being divided into three vertical parts, with the addition of the sentiment at the "Sweet Spot" where two lines intersect.

This card has three divisions both horizontally and vertically. The vertical space is equal but the horizontal isn't. Also, If I had had this handy dandy clear plastic template, I might have dropped the poppies down a fraction so that the bottom of the frame aligned with the lower horizontal line. Then the sentiment would be right on the Sweet Spot too!

Three horizontal spaces that are not equal. The sentiment is behind a Sweet Spot, but not centered on it. That still works better than having the sentiment centered on top. It is more visually pleasing when it is close to centered over that spot.

This one has the boots right on the lines and the mantel right on the upper line. The boots help break up the space into three equal areas.

This card has three vertical spaces with the shell piece almost centered over the left line and the sentiment centered over the right line. Additionally the sentiment is in the Sweet Spot.

This is the final example for today. The space is divided into three horizontal areas. The sun stamp and the banners are in opposite sweet spots.

The Sweet Spot is where two lines intersect. Often important elements of design, such as the focal point or the sentiment, will be placed in this spot.

Try making your own clear plastic overlay to help you in your compositions. I know I'm going to use mine!

Have a blessed day,
Trude


Tuesday, December 15, 2015

Tuesday Tutorial # 27 Heart Smile Greeting card

The week's Tuesday Tutorial uses a thinlits die from the upcoming Spring Occasions catalog. Isn't it fun to have sneak peeks of upcoming products? That is what's fun about being a Stampin' Up! demonstrator, we get to see what is in the new catalogs a couple of months before everyone else!

Tuesday Tutorial, Stampin' Up!, Stamp With Trude, Bloomin' Heart thinlits, greeting card, valentine, anniversary

Download the tutorial now  

 Have a blessed day, 

Trude 

Monday, December 14, 2015

Journal It! # 172

Journal It! 172

Here's a journal prompt for you to meditate on...

What style of worship do you enjoy the most and why?

Write the prompt in your journal and Journal It!

All Ye Faithful stamp set


Check out the new Hostess Code Gift offer 

Have you had a chance to check out the deals this week?

Sunday, December 13, 2015

Scrapbook Sunday # 27

It's difficult, when I have to take a photo of a page that is in a protector. This page has embellishments on the outside of the protector so it wouldn't look the same if I took it out. I like to add embellishments, in this case buttons and a bow, to the outside of protectors because it adds texture and depth and interest to the page, plus if I want to remove the items it is easier to remove them from the plastic.

I used two small cards from project life to add some color and interest. I also used some small heart stickers that I made by punching paper and adding Crystal Effects.

The background paper is from the Subtle Designer Series paper stack and the mat for the birth announcement and photo is a piece of printed vellum that I had from sources other than Stampin' Up!

The "It's a girl" stamp is from the A Dozen Thoughts stamp set.

Saturday, December 12, 2015

Journal It! # 171

Journal It 171

Here's a journal prompt for you-

During your life, have you had any interesting or important visitors to your home?

Write the prompt in your journal and Journal It!


Have you visited my Stampin' Up! store lately to see what the Weekly Deals are and check out the Clearance Rack? Here's a link to my Stampin' Up! store

Friday, December 11, 2015

Journal It! # 170

Journal It 170

The next journal prompt I have for you:

What is your favorite color? Do you have memories associated with that color?

Write the prompt in your journal and Journal It!

Work of Art
 

Thursday, December 10, 2015

Throwback Thursday # 27 Paint Prints Poinsettia

I don't think this stamp set was intended to be a Christmas stamp set but it is fun to see what happens when we try different things.

This stamp set is one that Stampin' Up! offered in 2005. It was a hostess set and is called Paint Prints.

I decided to use the rectangle, that is in the set, to create a background mosaic. I could have used it horizontally to create a brick pattern instead, but I like the mosaic effect for this holiday card.

Painted Prints, hostess set, Stampin' Up!, Throwback Thursday, Stamp With Trude, Christmas card, poinsetia, mosaic
Current products I used:
Whisper White card stock
Daffodil Delight ink pad
Cherry Cobbler ink pad
Cherry Cobbler reinker to dye twine
Garden Green ink pad
Gold embossing powder
Tape punch

Retired products I used:
Crisp Cantaloupe Thick Baker's twine (redyed with Cherry Cobbler reinker)
Paint Prints stamp set
Brushed Gold card stock

Other:
Stazon inks in red, blue, green and purple for the mosaic background

Have a blessed day,
Trude

Wednesday, December 9, 2015

Wednesday 201- Beyond the Basics- Ribbons

Welcome back to another Wednesday 201

Have you discovered that ribbons add so much to our paper crafts? Here are a few ways that I have used ribbon on my cards.


Stamp With Trude, Stampin' Up!, Wednesday 201, Beyond the Basics
The ribbon is actually lace in this card and the lace is used to enhance the old fashioned look of the card. It is simply wrapped around the panel and tied in a knot. A bow would overwhelm the card taking emphasis away from the focal points instead of adding to them.

Stamp With Trude, Stampin' Up!, Wednesday 201, Beyond the Basics
The ribbon on this card was used both as a transition between the two card stocks and as a counter balance for the snowflake. It also aids in the basic design of the card by bringing the eye from the upper left hand corner (the eye's natural starting point) across the card to the snowflake, in a 'z pattern' down to the lower left corner and then the ribbon strip helps draw the eye to the right. The 'z pattern' is a natural pattern the for the eyes and pleasing to the brain.

Stamp With Trude, Stampin' Up!, Wednesday 201, Beyond the Basics
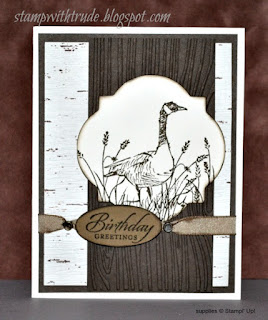
For this card the ribbon is simple. It is fastened with brads on both sides of the oval sentiment and is used to add emphasis to the sentiment. The use of ribbon can be tricky on masculine cards. If I use ribbon on masculine cards it is usually kept simple, no bows.

Stamp With Trude, Stampin' Up!, Wednesday 201, Beyond the Basics
Here I used the ribbon to anchor the tag. It gives the needed pop of accent color and the bow adds interest to the focal point.

Stamp With Trude, Stampin' Up!, Wednesday 201, Beyond the Basics
The ribbon is used for a transition on this card between the vertical dark paper and the horizontal printed paper. The bow is placed horizontally and helps that natural 'z pattern' that is pleasant to the eye; it also acts as a counter balances to the group of buttons.

Stamp With Trude, Stampin' Up!, Wednesday 201, Beyond the Basics
This ribbon is used as part of the card's embellishment. It adds interest, color and texture to the banner.

Stamp With Trude, Stampin' Up!, Wednesday 201, Beyond the Basics
This card needed the large bow to be an aid to the focal point. The butterfly was not 'heavy' enough to be the main focal point and needed some help. The stripe of ribbon also adds some contrast so that the butterfly doesn't disappear into the brown background.

Stamp With Trude, Stampin' Up!, Wednesday 201, Beyond the Basics
Because the two ribbon tabs are positioned at the top of the matted sentiment it acts as a counter balance to the flower on the other side. A simple way to add interest and emphasis to the sentiment too.

Stamp With Trude, Stampin' Up!, Wednesday 201, Beyond the Basics
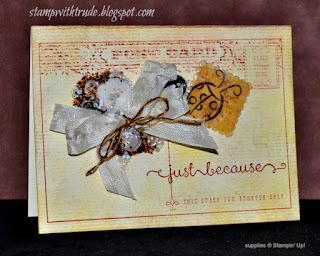
This bow is incorporated into the collage. Using Crystal Effects, buttons, and beads on and around the bow to create the main focal point of the card.

Stamp With Trude, Stampin' Up!, Wednesday 201, Beyond the Basics
This sentiment is actually stamped inside the card and a window is cut with an oval die. Then the ribbon was wrapped around the right side of the frame and tied in a bow. Another way to add a pop of color and counter balance the fox stamp.

Stamp With Trude, Stampin' Up!, Wednesday 201, Beyond the Basics

 I used twine on this card to go along with the fall theme. I vary the type of ribbon I use according to the type of theme/mood the card has. For an elegant card I would go to the satin ribbon first. For a casual look I would use twine, cotton ribbon, twill or gross grain depending on the theme. When I create masculine cards the choices are the same as the casual cards. For feminine cards I use more satin, lace, seam binding and cotton ribbons.

Stamp With Trude, Stampin' Up!, Wednesday 201, Beyond the Basics
I used ribbon to embellish the embellishments on this card. The small nosegays just needed a little extra emphasis.

Stamp With Trude, Stampin' Up!, Wednesday 201, Beyond the Basics
This sample shows that you don't even need a lot of ribbon to add a special touch. I used about 3 inches and cut a 'v' in each end then wrapped the prongs of a decorative brad around it. It is just enough without being overwhelming and it draws your eye to the sentiment.

Stamp With Trude, Stampin' Up!, Wednesday 201, Beyond the Basics


Stamp With Trude, Stampin' Up!, Wednesday 201, Beyond the Basics
A simple ribbon bow can be very effective too. For an even more feminine look, switch out the ribbon for a lacy bow.

Stamp With Trude, Stampin' Up!, Wednesday 201, Beyond the Basics
Here I wanted to bring in more color so I repeated the color of the lobster and then added a contrasting ribbon. The ribbon is a dotted gross grain and the overall feel of the card is masculine, so I kept the ribbon simple and flat and added a bottle cap with a stamped anchor insert to continue the marine/nautical theme.

Stamp With Trude, Stampin' Up!, Wednesday 201, Beyond the Basics
This elegant card calls for an elegant ribbon  I used a knot instead of a bow so that it would add interest, but now flow over onto the next panel and distract from the focal point. I also ran it behind the focal point panel.

Stamp With Trude, Stampin' Up!, Wednesday 201, Beyond the Basics
Have you created any banner cards? Use twine or ribbon to anchor the pennants. Here's another card with a banner. but instead of the banner being the entire width it is to one side and is balanced by the embossed white swirl.

Stamp With Trude, Stampin' Up!, Wednesday 201, Beyond the Basics

 The next two cards use ribbon to move the eyes across the card. The first card has a wide ribbon that had the effect of dividing the card into three spaces. That uses the rule of three. Threes are also pleasing to the eye. You can look back through the samples and see how I have applied this rule. Sometimes I use three of the same item, sometimes I use groups of three and then as in this top card there are cards with three 'spaces'.

In the second card you can see that it again employs the 'z pattern' to move the eye across the card.


Stamp With Trude, Stampin' Up!, Wednesday 201, Beyond the Basics

Stamp With Trude, Stampin' Up!, Wednesday 201, Beyond the Basics

I know this is a very long post. I hope that it has been interesting. Have fun with ribbon, you will find that it can add so much interest to your projects!

Have a blessed day,
Trude


Tuesday, December 8, 2015

Tuesday Tutorial # 26 Sleigh Ride Christmas Card

It is getting very close to Christmas and there is still lots to do. Here is a quick and easy card for you to create. You can create quite a few of these cards in very little time!
Sleigh Ride, Stampin' Up!, Stamp With Trude, Winter Wonderland vellum, Tuesday Tutorial


You can get the tutorial now by using this link. 

 Have a blessed day, 

Trude 


Monday, December 7, 2015

Journal It! # 169

Journal It! 169

Another journal prompt for you...

Tell about any unusual pet that you have had. If possible, include a picture.

Write the prompt in your journal and Journal It!

Zoo Babies

Check out the new Hostess Code Gift offer 

Sunday, December 6, 2015

Scrapbook Sunday # 26

Have you noticed this shiny foil Designer Series Paper in the Holiday catalog? Only a few weeks left to grab some. It makes pages that shine...it is not easy to get a really good photo of this page, but I hope you can get the idea. The upper left corner shows the true color of the trees.

Festival of Trees, Stampin' Up!, Stamp With Trude, Foil Designer Series Paper, Christmas scrapbook page layout, Scrapbook Sunday
I also used the red foil paper that is in the holiday catalog. I just ordered more so that I can use it for Valentine's Day cards. I don't think it is in the Spring catalog, so I suggest you stock up on that now too, while you can still get it.

The stamp set that I used is called Festival of Trees. It is in the annual catalog and will be available through May 31, 2016.


Festival of Trees